In this blog, we will talk about features that we implemented in project called ReCommerce – Flutter developed application for iOS/Android platforms and explain how to use custom painting in Flutter.
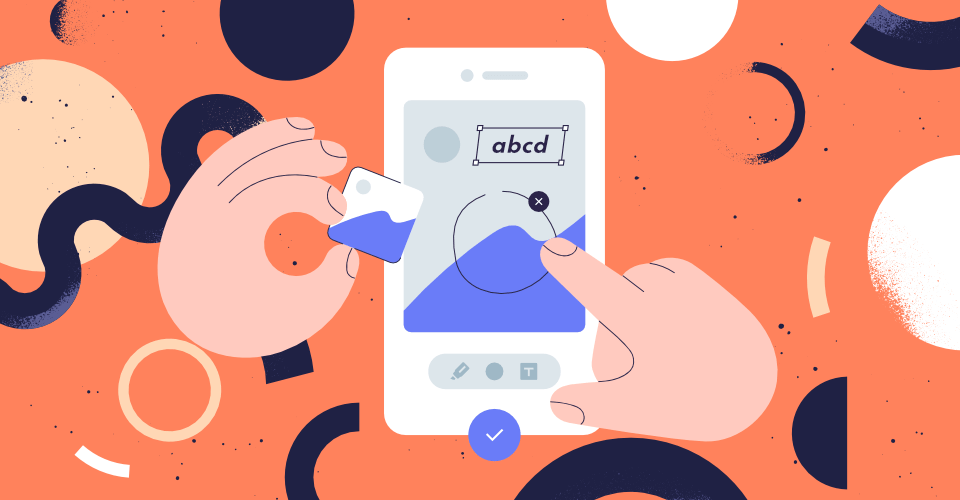
The Recommerce app we worked on is a B2B app to make day-to-day responsibilities easier for specialists in the e-commerce business. The purpose of the application is the identification of goods and inventory with a mobile camera. Taken images can be edited directly in the app and transmitted to the Recommerce system. By editing we mean the possibility to add text over the image, draw circles or lines over the image which is all connected to custom painting in Flutter.
General idea of custom painting in Flutter and CustomPaint widget
General idea of the app is to have a canvas which will have an image and various shapes in a stack in order to show shapes over the image. In order to do this, it is necessary to define a Stack widget whose children are on top of each other. Bottom child of the Stack widget is the image. Above the image are three CustomPaint widgets – every for one of the available drawing options. CustomPaint widget provides a canvas on which to draw during the paint phase. It paints on the canvas the data that it has in the painter attribute. The painters are expected to paint within a rectangle starting at the origin and encompassing a region of the given size.
For all three canvas, painter attributes are the classes that extend the CustomPainter class. In that way, all specific required settings can be added and created in that specific class. By dividing every canvas, it is ensured that the user can modify every canvas separately – draw or delete drawn shapes. Every drawn point – touched point is defined with a custom model – TouchPoint. This class has three parameters – paint, radius and offset points. Paint defines the style which will be used when drawing on a canvas. Radius is used for circles. Offset defines the center point of the circle, and for the drawn lines it defines the stroked line between the current defined offset and the next one.
Code example:
class CirclePainter extends CustomPainter {
 CirclePainter({this.circleList});

 List<TouchPoint> circleList;
 List<Offset> offsetPoints = List();

 @override
 void paint(Canvas canvas, Size size) {
   for (TouchPoint touchPoint in circleList) {
     canvas.drawCircle(
       touchPoint.points,
       touchPoint.radius,
       touchPoint.paint
     );
   }
 }

 @override
 bool shouldRepaint(CirclePainter oldDelegate) => true;
}
Drawing Circles using Flutter
All three types of drawing are made using the GestureDetector widget. It is a widget that detects gestures. It attempts to recognize gestures that correspond to its non-null callbacks. There are two types of the callbacks – pan and scale callbacks. They can not be used simultaneously because scale is a superset of pan. For circles, we use scale callbacks. There are also two types of events that need to be recognized in the GestureDetector widget in order to draw the circles.
First is creating a new circle or moving the created circle around the screen. The second one is the scaling of the circle – changing the radius of the circle. Callbacks from GestureDetector that are going to be used are onScaleStart, onScaleUpdate and onScaleEnd. In the onScaleStart is defined the creation of the new circle or moving the current one previously created. The decision what needs to be done can be solved by using the bool variable which will define whether the new circle be created. In the onScaleUpdate every continuous drag of the finger around the canvas is recognized and on every new callback the update of the current circle is made. Based on the ScaleUpdateDetails which defines all details and settings of the current callback, proper behavior is presented. Whether the user moves the circle around the canvas or is the circle scaling is defined by the scale attribute of the details.
If the value of the scale is equal to 1, it means that the user drags the finger over the canvas, so the circle should move around the canvas based on focal points from details – focal point defines the center of the circle. Otherwise, if the scale attribute is not equal to 1, the user drags with more than one finger over the canvas, so the circle should scale based on the value from callback. This is a little bit tricky because it needs to remember the previous local focal point in order to center the circle between the current and previous recognized gesture. Inside the onScaleEnd callback, only needs to detect that the user has moved out of the canvas.
Code example:
onScaleStart: (ScaleStartDetails details) {
 setState(() {
   if (_shouldCreateNewCircle) {
     _circles.add(
       TouchPoint(
         radius: _defaultCircleRadius,
         points: details.focalPoint,
         paint: _circlePaint,
       ),
     );
     _shouldCreateNewCircle = false;
     _currentPosition = details.focalPoint;
     RenderBox renderBox = context.findRenderObject();
     _circles.last.points = renderBox.globalToLocal(details.localFocalPoint);
   }
 });
 _currentCircleRadius = _circles.last.radius;
},
onScaleUpdate: (ScaleUpdateDetails details) {
 setState(() {
   RenderBox renderBox = context.findRenderObject();
   if (details.scale == 1) {
     if (!_isCircleScaling) {
        _circles.last.points = renderBox.globalToLocal(details.localFocalPoint);
     }
     _currentPosition = details.focalPoint;
   } else {
     _isCircleScaling = true;
     _previousPosition = _currentPosition;
     _currentPosition = details.localFocalPoint;
     _circles.last.radius = _currentCircleRadius * details.scale;
     _circles.last.points = renderBox.globalToLocal(
       Offset(
           (_previousPosition.dx + _currentPosition.dx) / 2,
           (_previousPosition.dy + _currentPosition.dy) / 2,
       ),
     );
   }
 });
},
Drawing lines
Similar to drawing the circles, drawing the lines means drawing the points based on user touchpoints. Callbacks that are used are onScaleStart and onScaleUpdate. On every callback new TouchPoint is added to the current list of all points.
Code example:
_points.add(
  TouchPoint(
     points: renderBox.globalToLocal(details.localFocalPoint),
     paint: _linePaint,
  ),
);
In that way, every gesture is recognized and added to the list. All points from the list form the line that the user has drawn by touching and moving the finger over the canvas. One important thing to consider in the onScaleUpdate callback is to determine if the user touches the canvas with only one finger. Similar to the circle drawing – add a touched point to the list of points only if the attribute scale of the details is equal to 1.
Text input
To input text using Flutter, the user needs to set the position of the text on canvas first. After that, the user can enter the text in the text input or move the position of the text input over the image. To set the position of the text input, two gesture callbacks are used – onPanStart and onPanUpdate. Position of the text is defined by the global position of the callback’s details. The only difference between those two callbacks is additional checking if the new text input should be created and requesting the focus on created text input inside the onPanStart callback.
Image export
To export the image with drawn circles, lines and texts on canvas, all drawn things in canvas should be rendered together. Firstly, the main thing is the background – the image. Image is rendered with the paintImage method from the decoration_image class which paints an image into the given rectangle on the canvas. Also, all three types of drawing are included with proper size and scale to ensure that all drawn shapes are in the right place.

Ready, set, draw!
This blog with code examples shows how we implemented custom painting in Flutter and drawing over the image in a Flutter application. The logic behind development would be the same for native applications as well. All used examples can be changed or modified depending on requirements of a specific project but the logic of gesture detection remains the same.

Stay tuned for more related features in our upcoming blogs and contact us if you’re interested in our Flutter App Development services!

-
Instagram
-
Linkedin
-
Facebook
info@samurai-digital.com